
How to Install Google Analytics on Your Site
In this article, we will guide you through a simple installation of Google Analytics, starting with creating your first Google Analytics account. A Google Analytics account can manage up to 100 properties, each with multiple data streams, allowing you to track data from various sites or platforms.
Step 1: Create a Google Account
Before accessing Google Analytics, you need a Google account. If you don’t have one, you can create it using any email address, including professional domains. You don’t need to create a Gmail account; simply select “Use my current email address instead” during the setup.
Step 2: Create Your Google Analytics Account
-
- Log in to Google Analytics: Visit Google Analytics and log in.

-
- Start Measuring: If this is your first account, click on “Start measuring.”
- Account Name: Choose an account name (often your company name).
- Property Name: Enter a property name that corresponds to your website (e.g., your website’s URL).
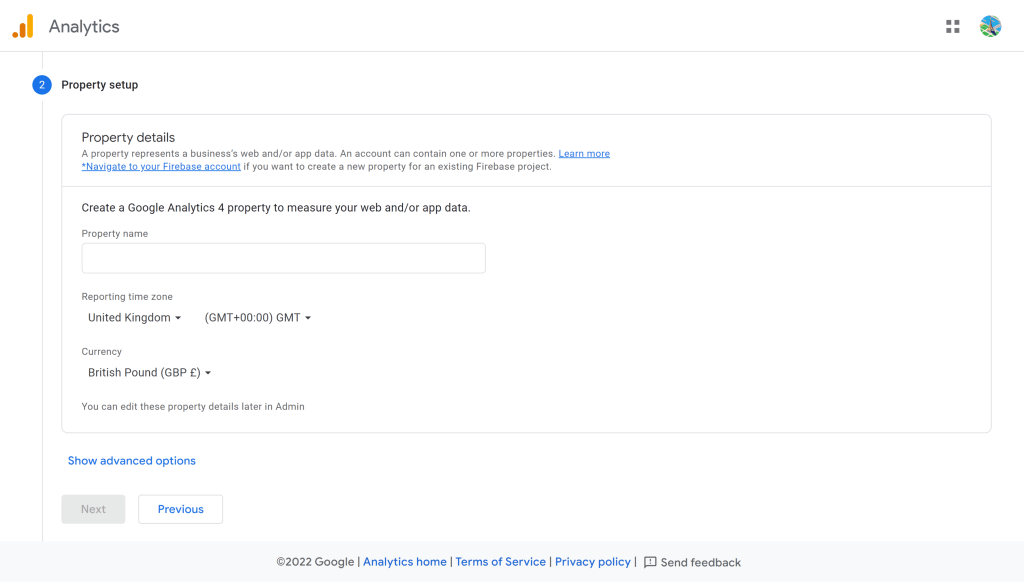
- Configure Reporting Time Zone: Select the correct country and reporting time zone, as this will affect how data is reported.
- Accept Terms of Service: Review and accept the Google Analytics Terms of Service Agreement.
Step 3: Set Up a Data Stream
-
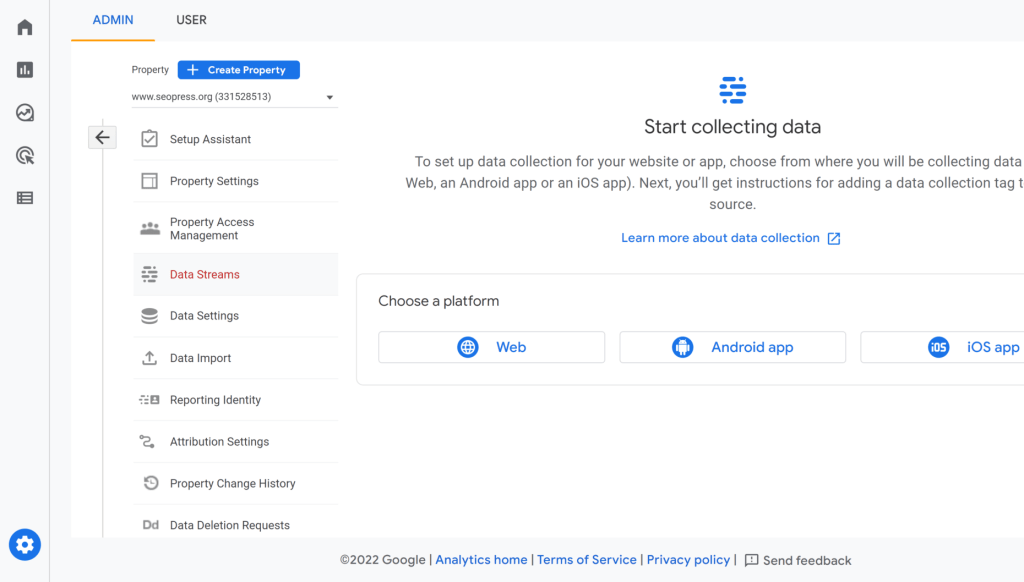
- Access Data Streams: Once your account is set up, you’ll be directed to the property settings. Click on Data Streams in the Admin section.
- Add a Web Data Stream: Click on the Web button, enter your website’s URL, and give your data stream a name.
- Enhanced Measurement Options: Review the enhanced measurement options, which allow for automatic tracking of key user interactions.
- Create Stream: After configuring your settings, click on Create Stream.
Step 4: Find Your Measurement ID
After creating the stream, you’ll see a details page that includes your Measurement ID, which looks like ‘G-XXXXXX’. Copy this ID, as you’ll need it for installation.
Step 5: Install Google Analytics with Reluxity
- Access Reluxity Dashboard: Log in to your Reluxity admin panel.
- Navigate to Analytics Settings:
- Go to SEO > Analytics.
- Enable Google Analytics:
- Check the box to enable Google Analytics tracking.
- Paste your Measurement ID into the appropriate field.
- Save Changes: Click Save Changes to apply your settings.
Step 6: Verify Data Collection
After installation, you can check if data is being collected:
- Real-Time Data: In Google Analytics, click on the Home icon. You should see “Your website’s data is active” if visitors are already interacting with your site.
- Real-Time Reports: For immediate insights, navigate to Reports > Real-time to see user activity as it happens.